Install & Configure TIKTING®
Table of contents
- Step 1 - TIKTING Installer Package
- Step 2 - IIS Permissions
- Step 3 - Enable Named Pipes
- Step 4 - Configuring IIS Website
- Step 5 - Configure Process Model
- Step 6 - Add DNS Record
- Step 7 - Restart IIS
- Congratulations 🎉
Step 1 - TIKTING Installer Package
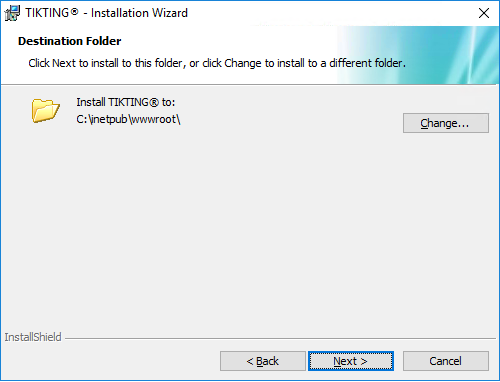
- Run the Installer Package and proceed to the screen where it asks for the Destination Folder.
Tikting installs in the IIS root directory. If you have chosen a different target location for your IIS, or you run your IIS Clusters on a different server, please choose the appropriate directory and click next.
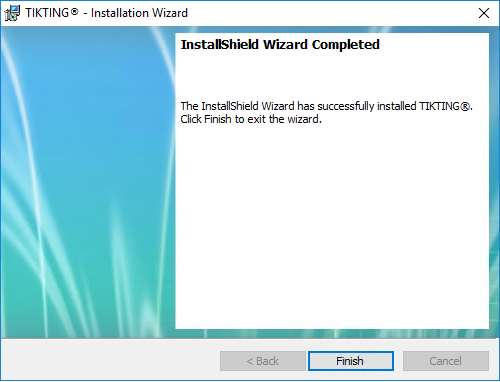
Please enter your Database server and login details as specified in the SQL Server Installation. Click next through the installation screens and finish the installer.
Step 2 - IIS Permissions
- We need to give IIS permissions to the Tikting installation directory. Right click the folder where Tikting is installed and click properties. Click Sharing. You need to give IIS_IUSRS full permissions as shown in the picture below.

Step 3 - Enable Named Pipes
- Open SQL Server Configuration Manager. Select SQL Server Network Configuration. Right Click Named Pipes and Click Enable.

Step 4 - Configuring IIS Website
In this step, we will configure the IIS Website, which involves creating an Application Pool, and installing the Website and SSL Certificate.
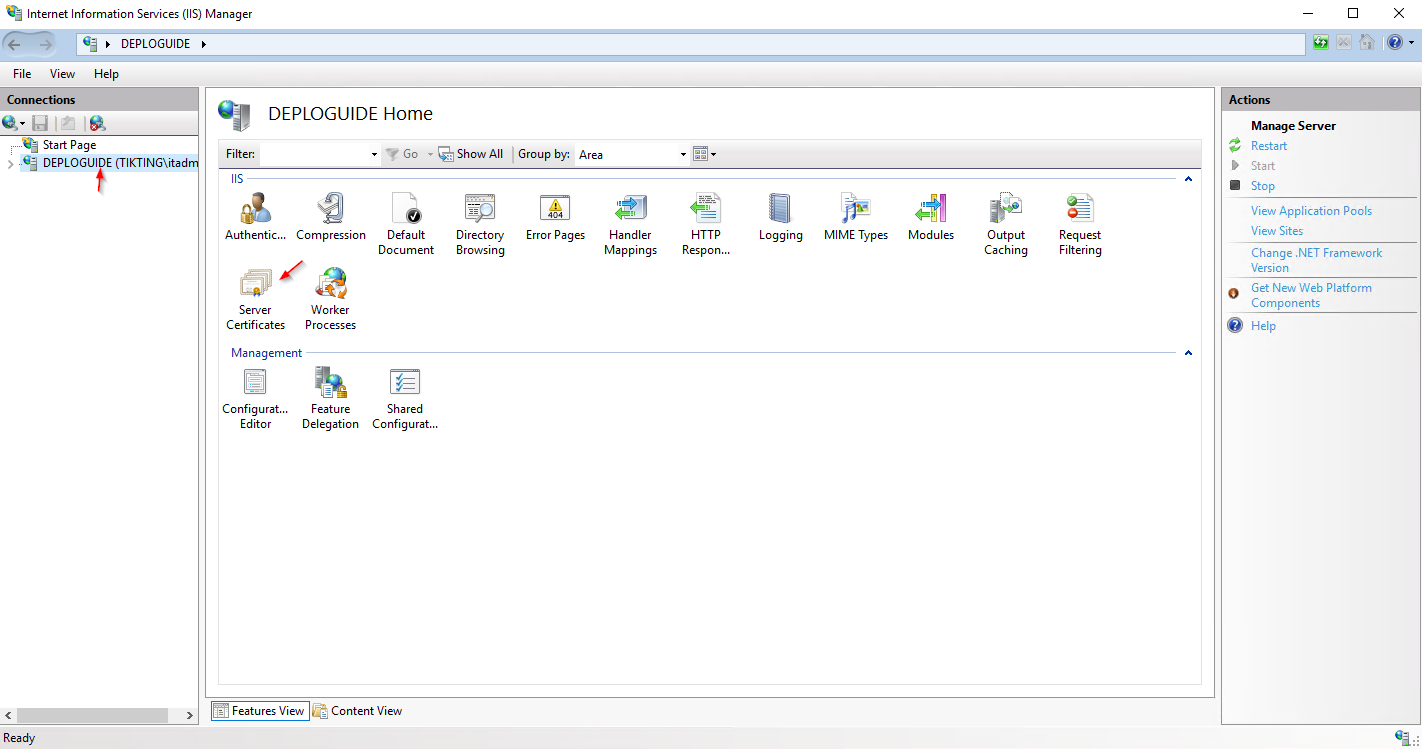
- Open IIS Manager from Server Manager > Tools > IIS Manager (from the drop down menu).
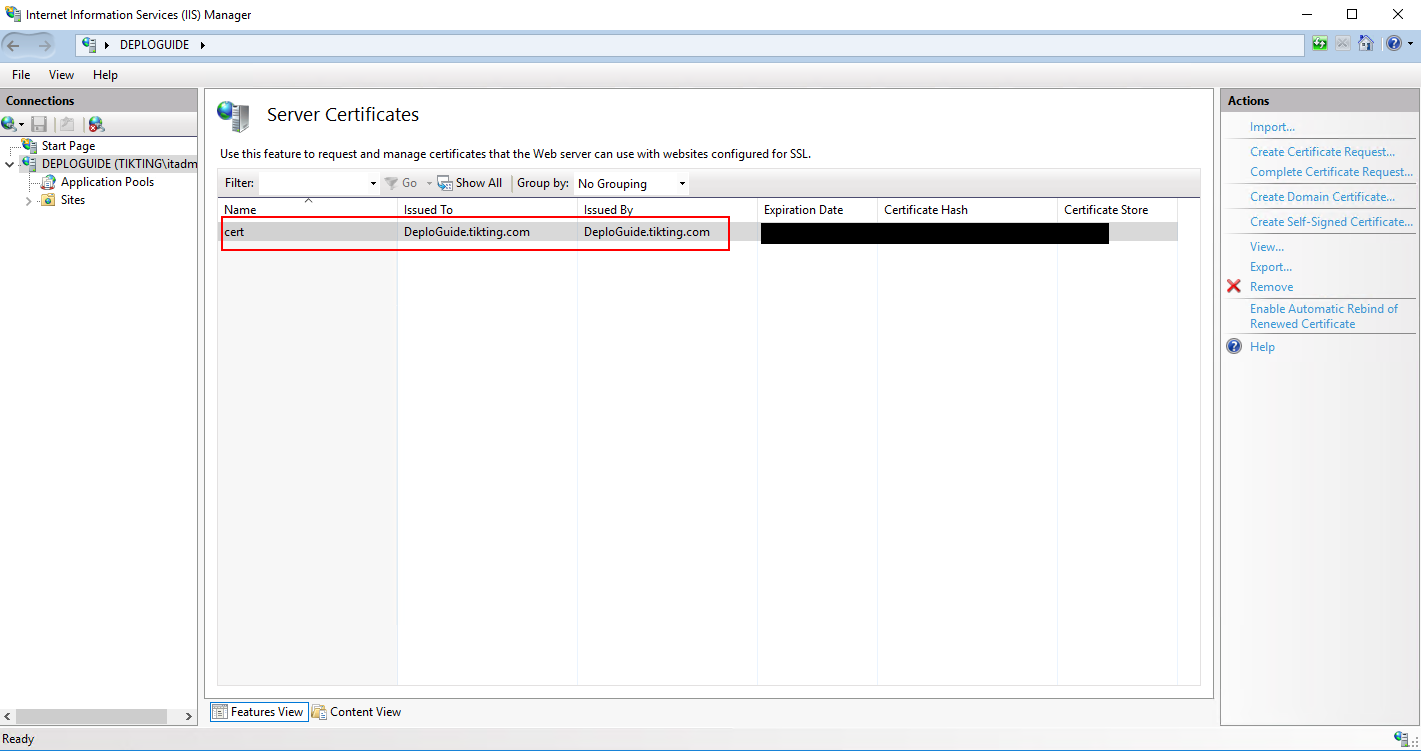
Click Server Certificates as shown in the picture.
SSL Certificate
- Choose SSL Certificate In this demonstration, we are creating a self-signed certificate. For your organization, please choose an appropriate SSL Certificate.
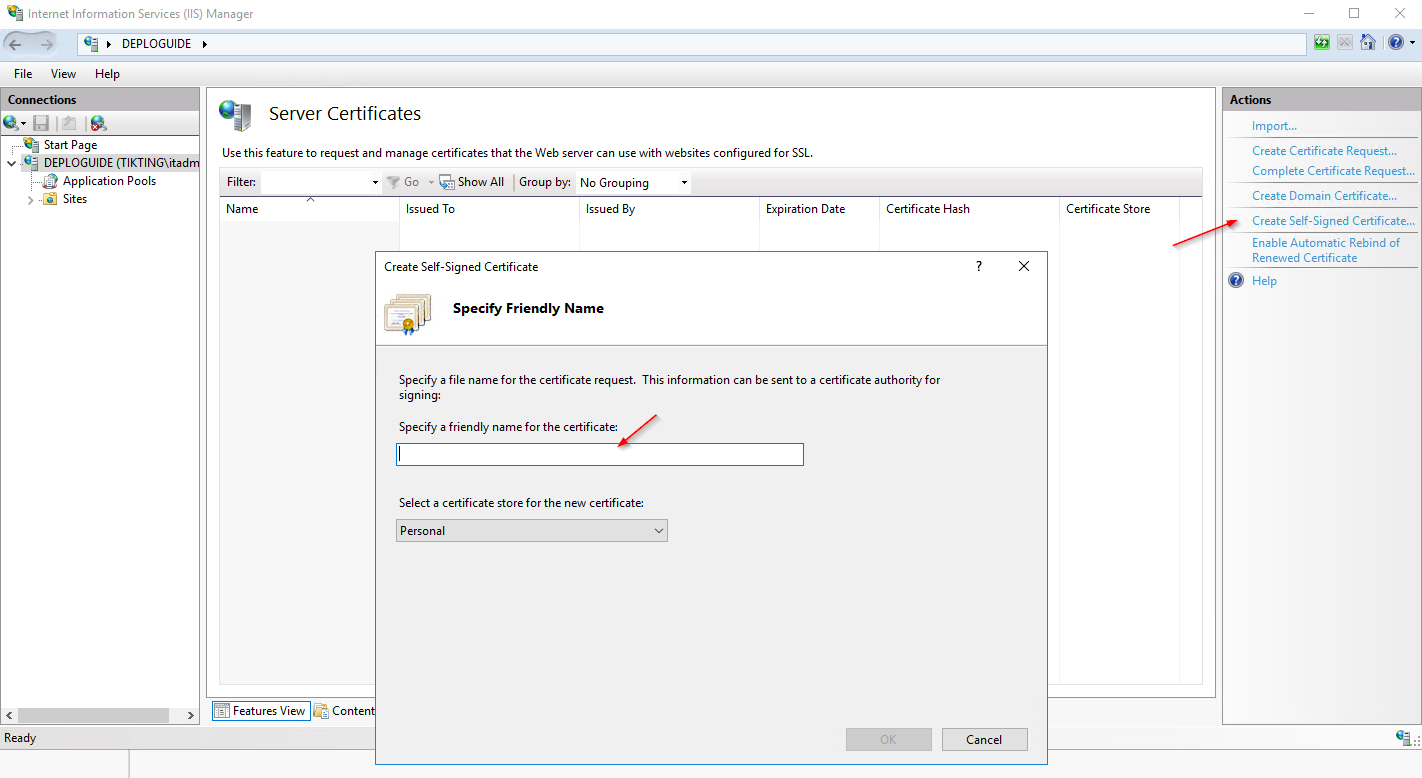
Once the certificate is generated / installed, it will show in the list.
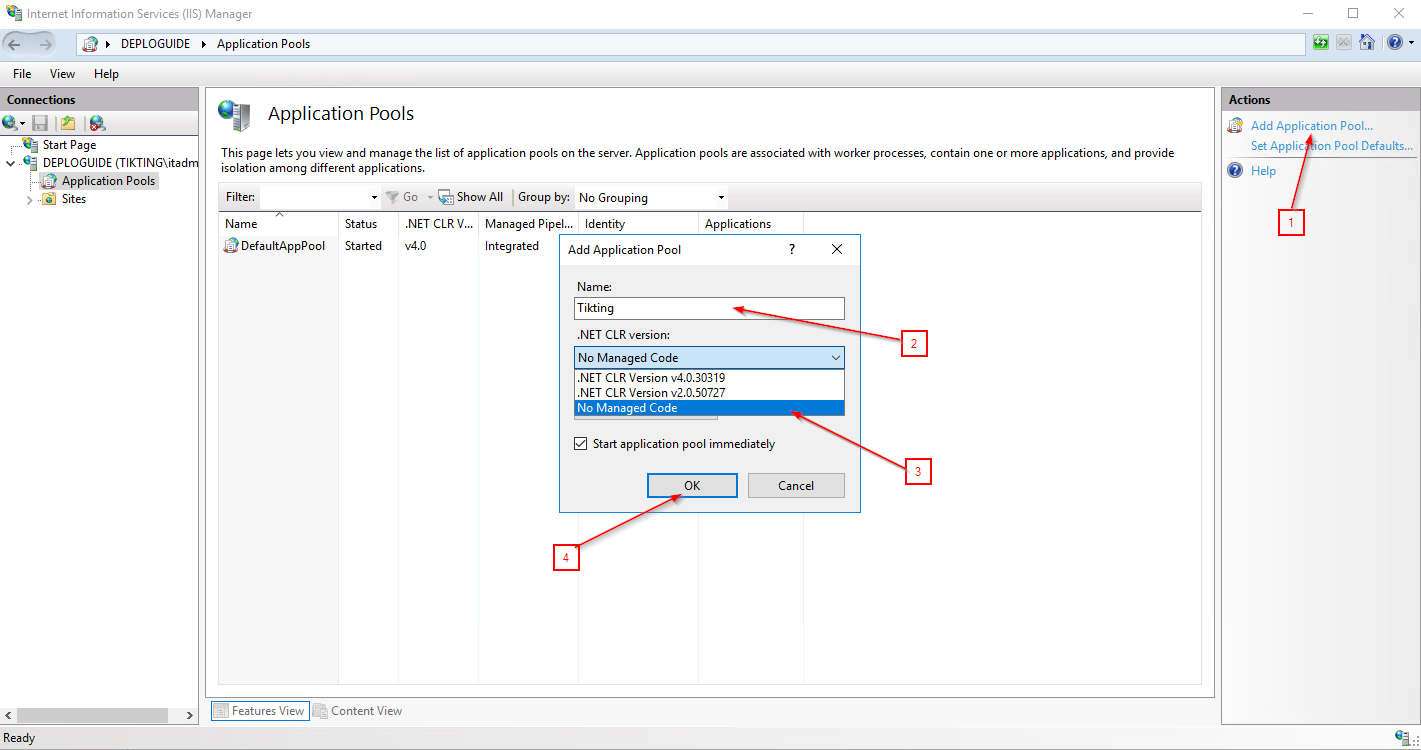
- Open the IIS Manager, select Application Pool and click Add Application Pool.
- Name the Application Pool and select the following.
- No Managed Code from the drop down.
- Keep the option set to Integrated.
- Keep the ‘Start this application pool immediately’ option checked.
Add Website
-
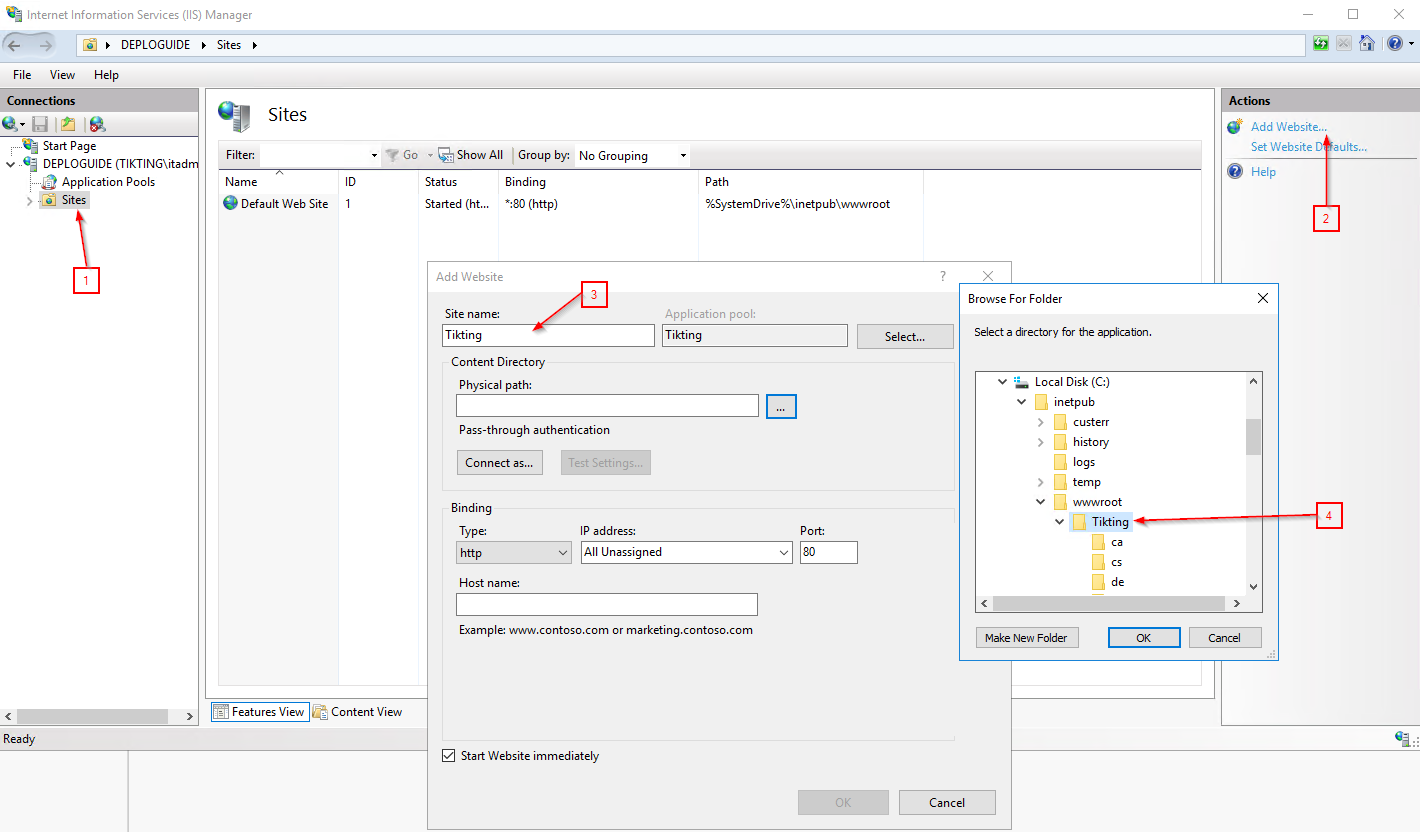
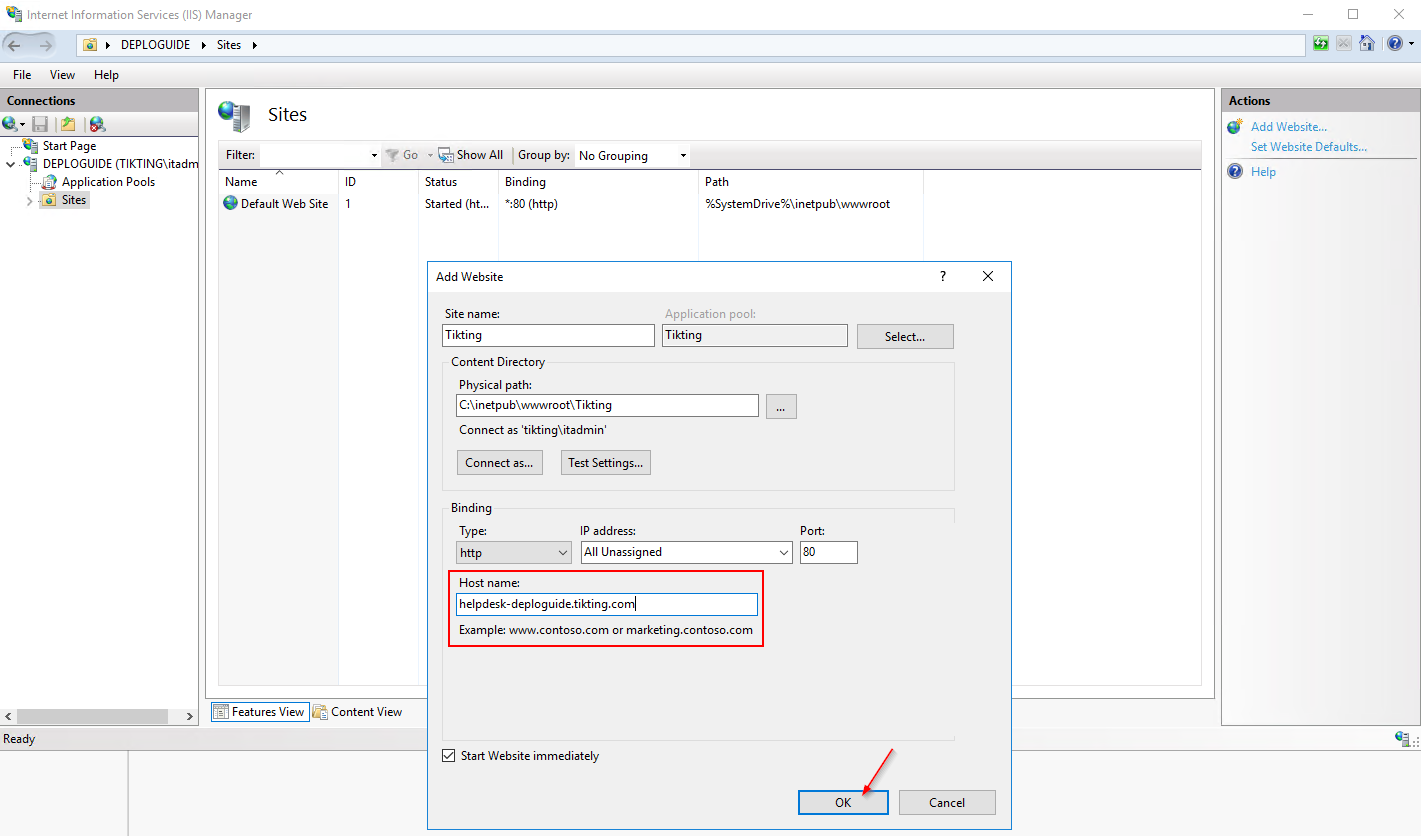
Open the IIS Manager, select Sites and click Add Website. Name your website and select the following.
- Select your Application Pool
- Browse and Select Physical Path of the Tikting Installation.
Admin User
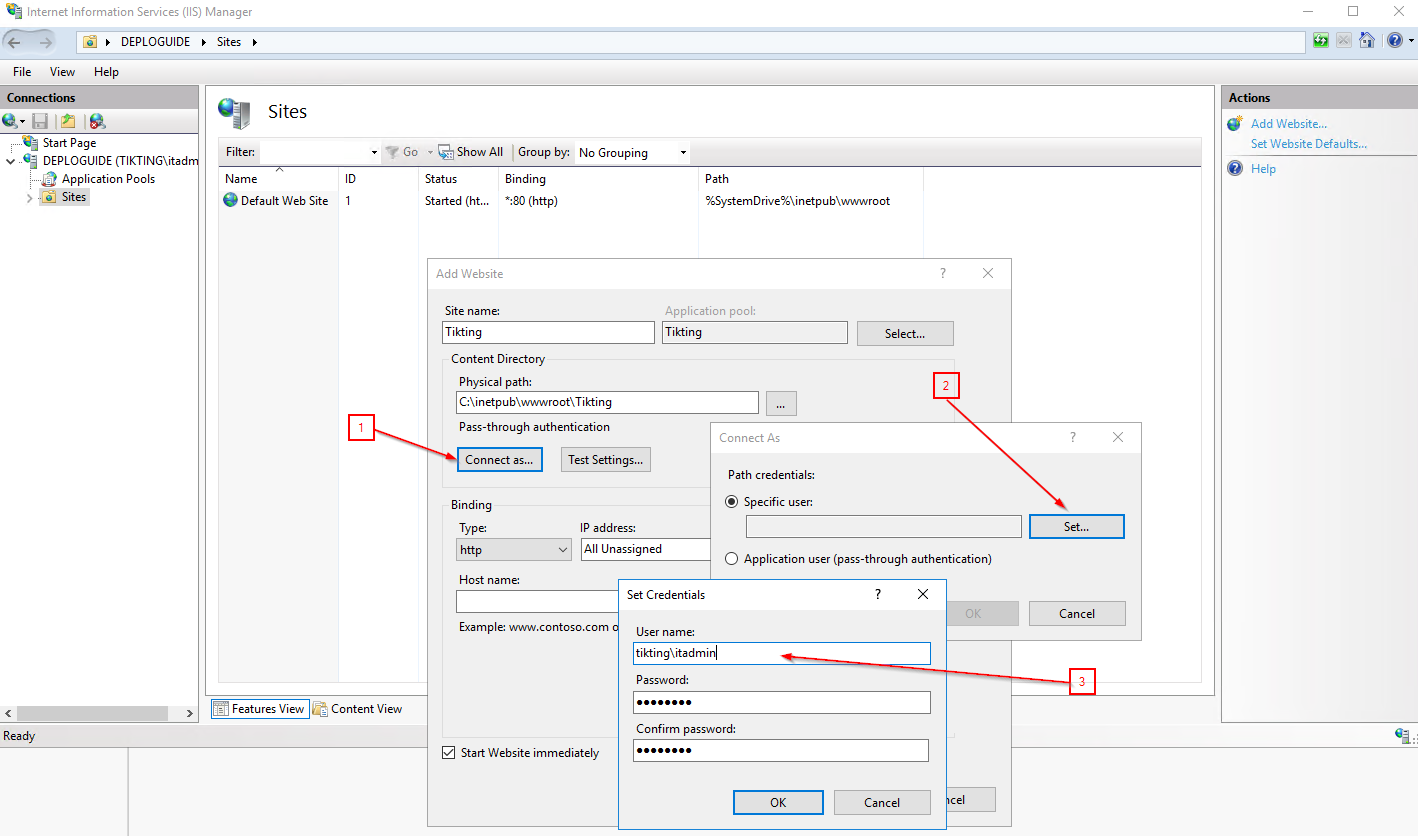
- Press Connect As, choose Specific User, set the credentials to an account with Domain Admin rights and click OK.
Choose URL
- In the hostname field, choose the URL at which you want to access TIKTING - Enterprise Service Management System.
Site Bindings
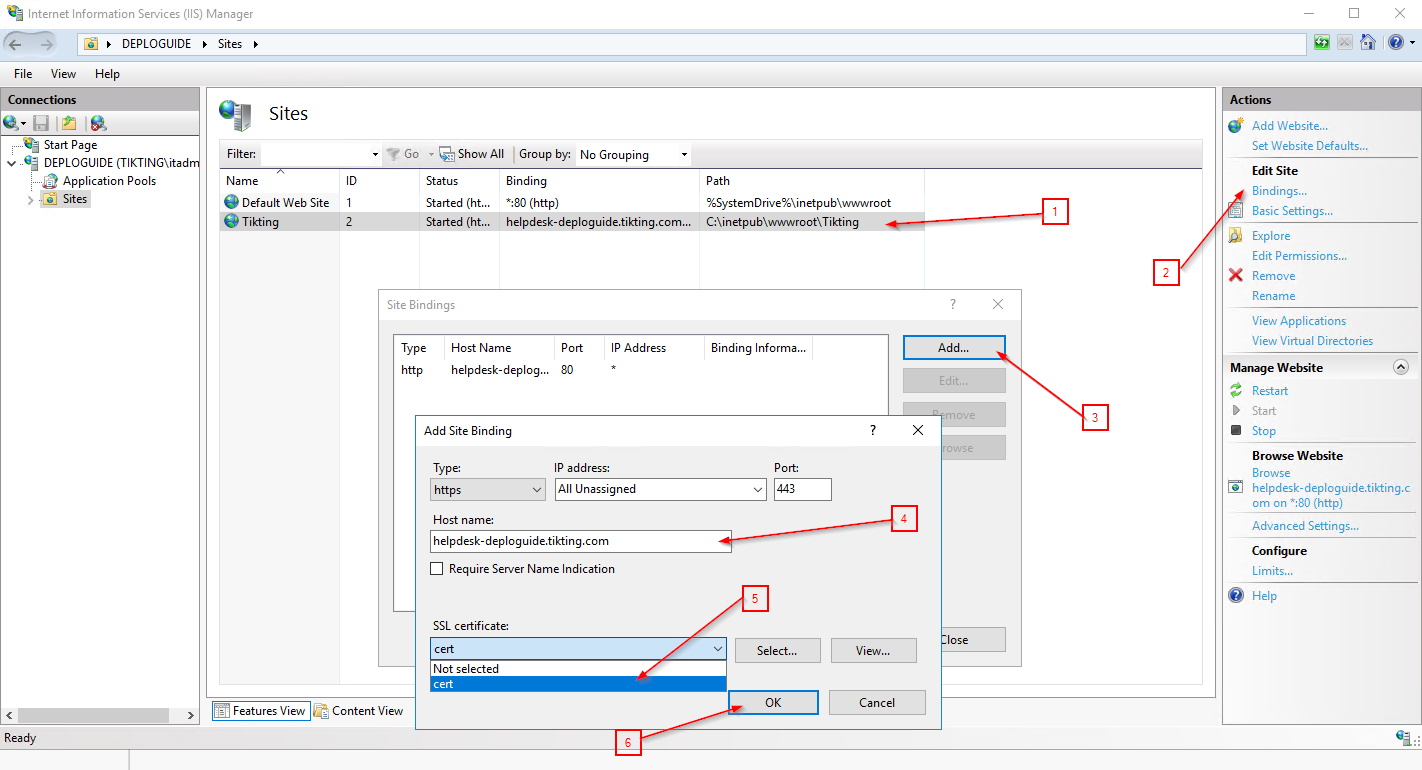
Once the site is created, we will want to create an HTTPS binding.
Click the Tikting Site in the Sites menu and select Bindings.
- Add Binding with the same hostname as in the previous step.
- In the SSL drop down menu please select the certificate which you have installed on your IIS.
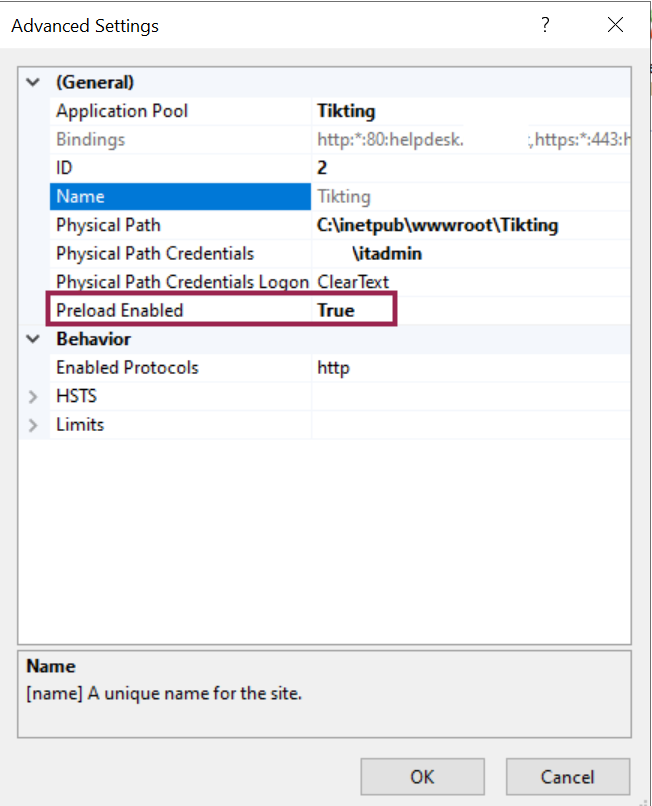
- Configure the Website Preload in advanced settings
Step 5 - Configure Process Model
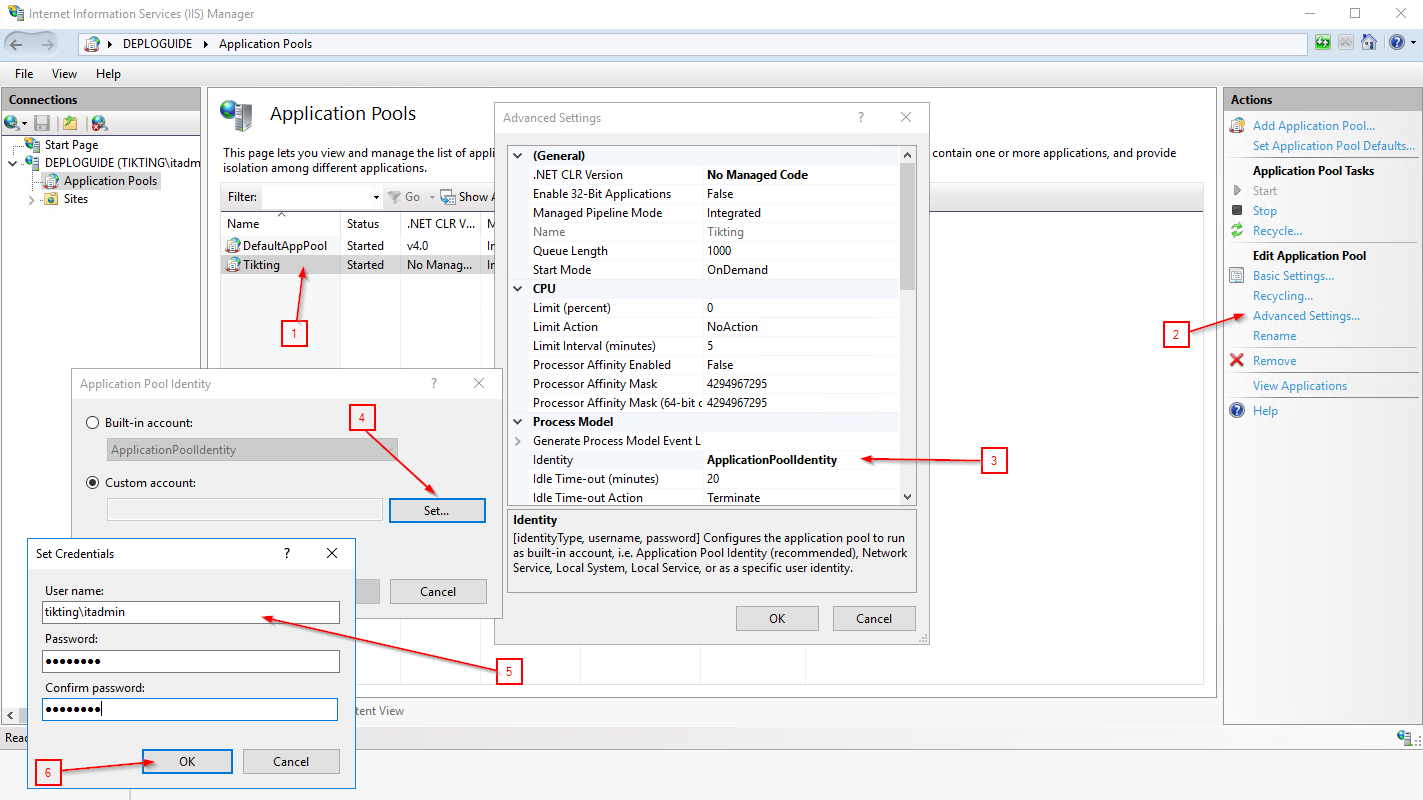
Select Application Pool User
- Open IIS Manager and select Application Pool > Advanced Settings for your Application.
- Under Process Model, click ApplicationPoolIdentity.
- Choose the User with Domain Admin Rights.
Startup and Shutdown Interval
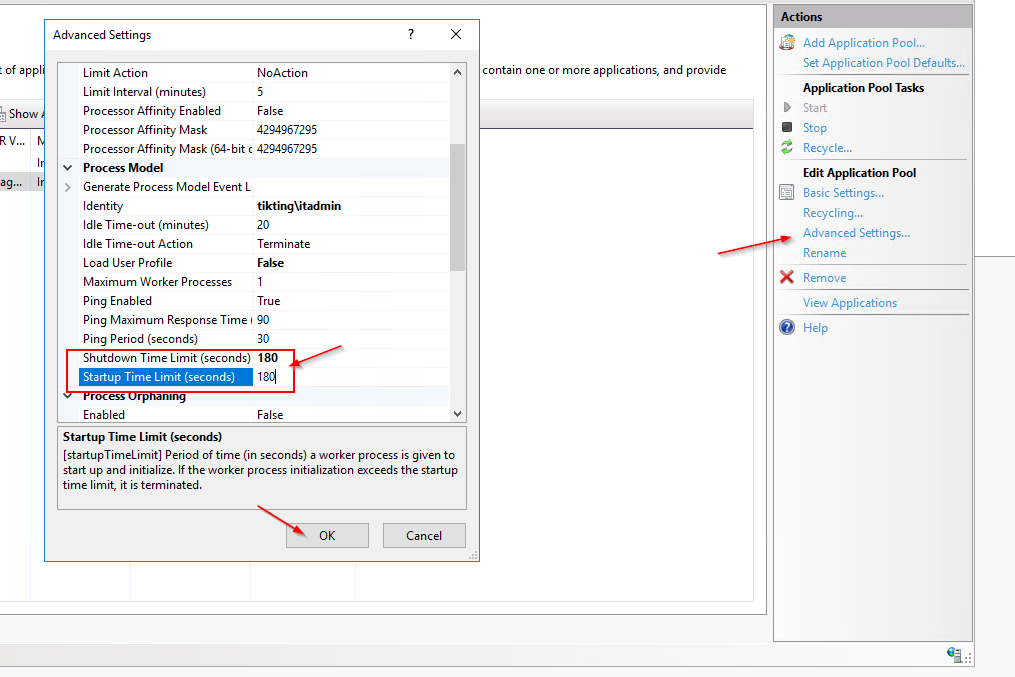
- Open IIS Manager and select Application Pool > Advanced Settings for your Application.
- Change the Startup and Shutdown Time Interval to 180 seconds for both options.
Disable Recycling
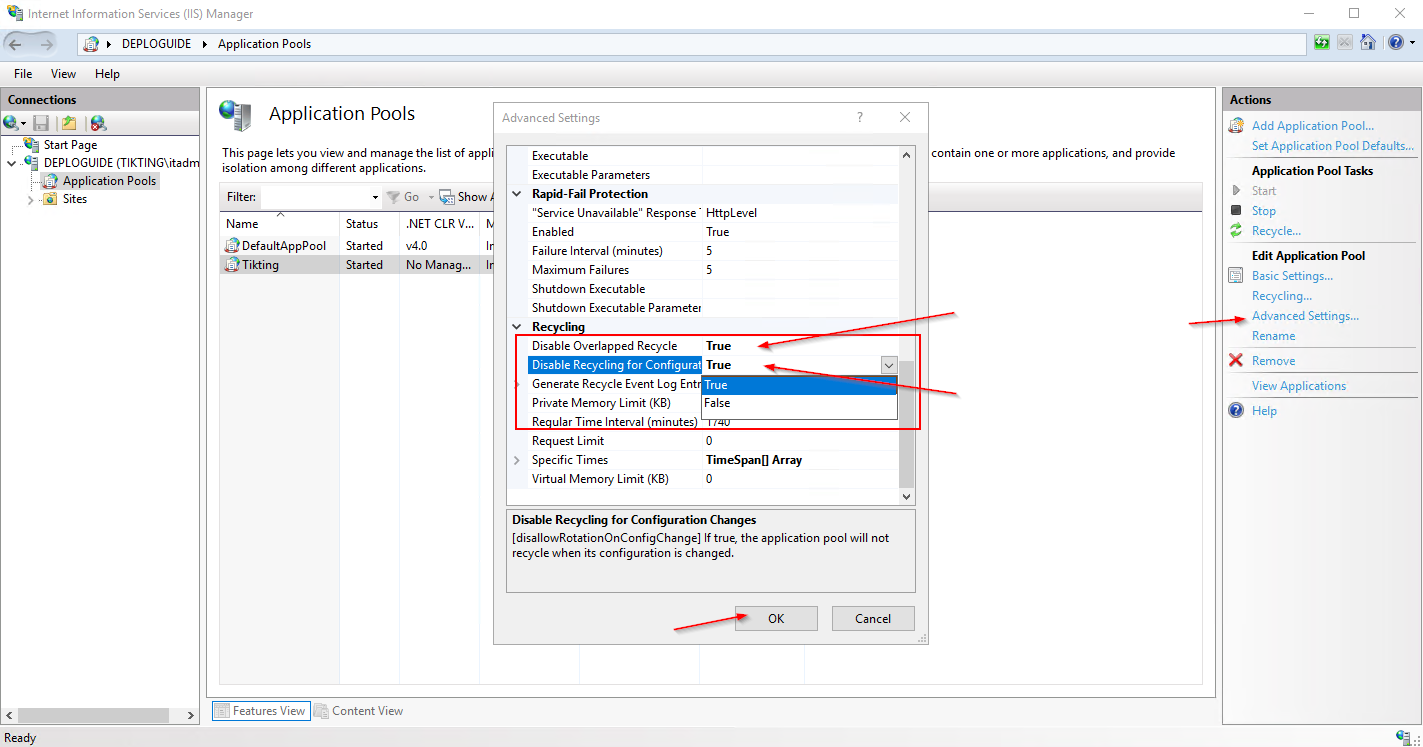
- Open IIS Manager and select Application Pool > Advanced Settings for your Application.
- Go to Disable Overlapped Recycle and Change the Option to TRUE.
- Go to Disable Recycling for Configuration and Change it to TRUE.
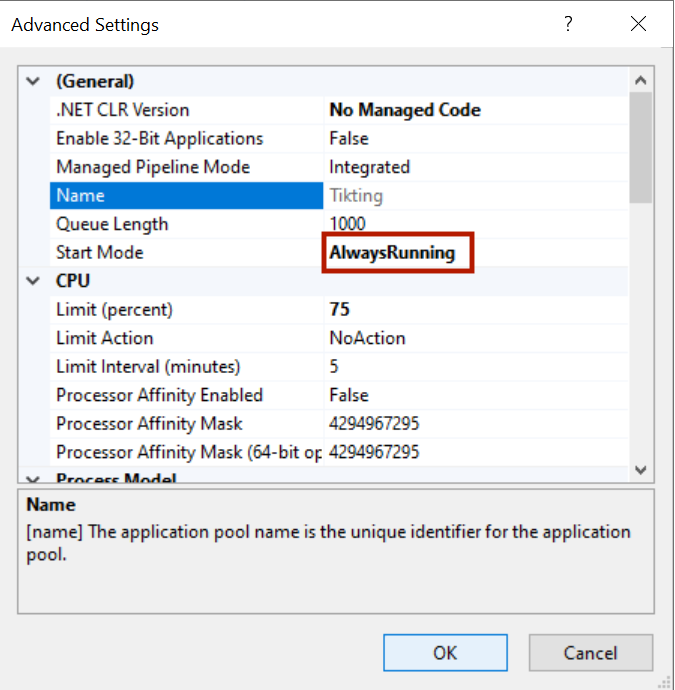
Application Preload, Start Mode, and Timeout Settings
- Configure the IIS Start Mode to Always Running
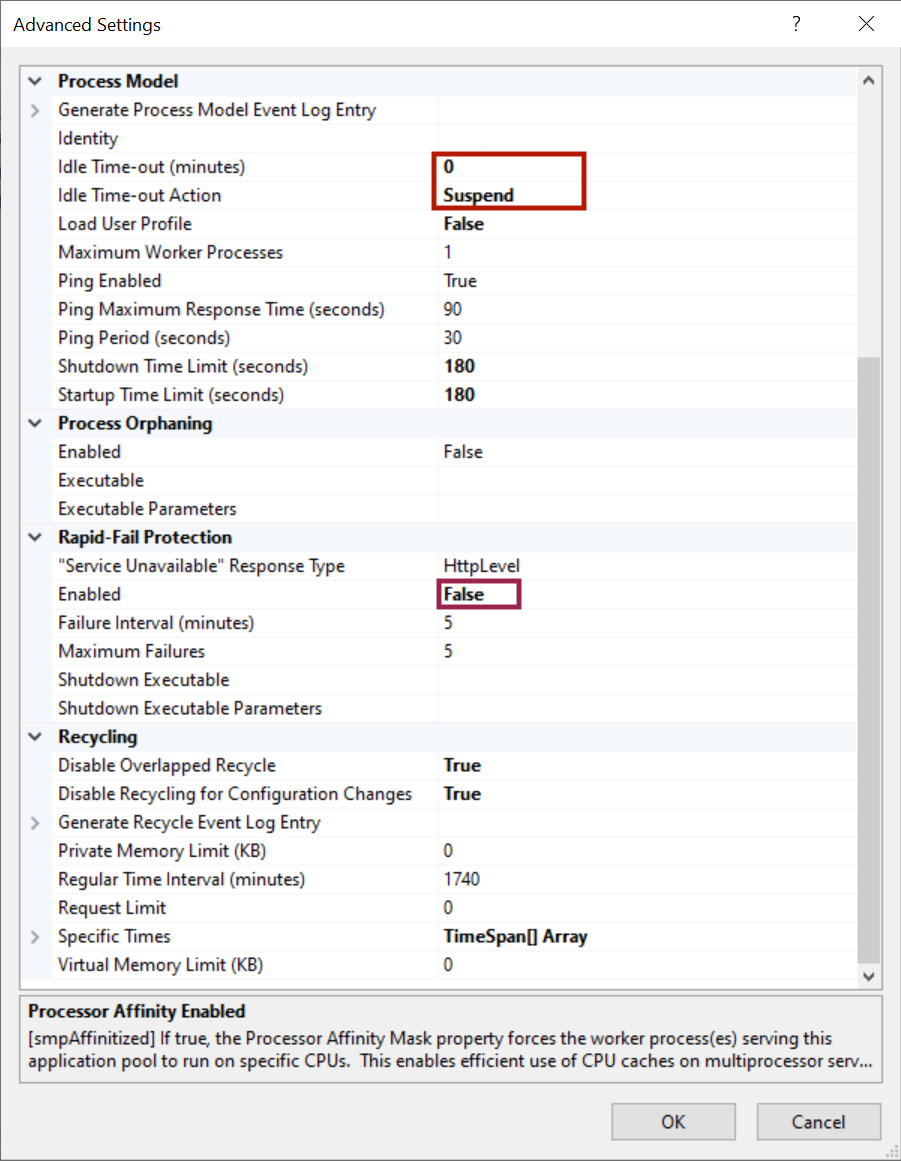
- Configure the IIS Idle Timeout Settings and rapid fail protection settings
Step 6 - Add DNS Record
When you create a VM and join it with a domain, it automatically associates an “A RECORD” of the machine’s hostname with the domain name.
E.g. if your domain name is mycompany.com and your VM computer name is helpdesk, your default A RECORD will be helpdesk.mycompany.com.
If your VM Computer name is the same as your IIS Website, you do not need to take this extra step. If your machine name is different from your IIS Website URL binding, you will need to create an “A RECORD” in your DNS Server.
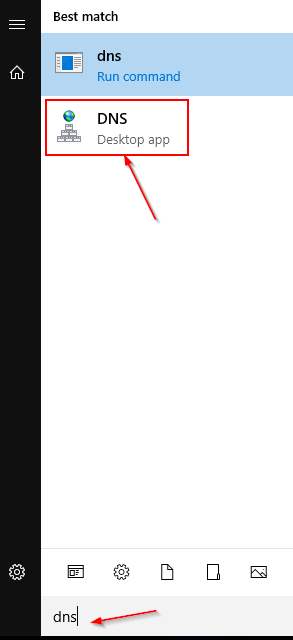
- Open DNS Application and Add a new A RECORD for your IIS Binding.
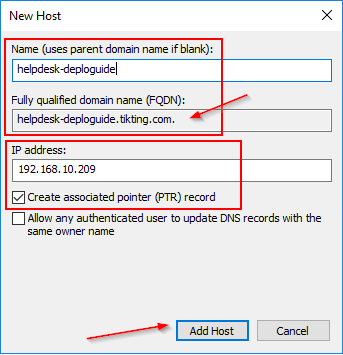
Once the process is completed, you may want to reload your DNS Zones.
Step 7 - Restart IIS
Go to CMD > run as Administrator
- iisreset /restart
- After a successful installation, restart the VM so all the services restart.
Congratulations 🎉
You have successfully installed TIKTING - Enterprise Service Management System. You can optionally install a Report Manager.