Table of contents
- SLA (Service Level Agreements)
SLA (Service Level Agreements)
SLA Qualification
All queries coming into the helpdesk are measured by two major criteria:
a. The response time of the query.
b. The resolution time of the ticket.
SLA Escalation
Escalation levels are used to trigger actions if either the response or resolution time has elapsed.
Escalation Actions
Escalations trigger actions in case of a breach of any SLA. These actions include:
a. Sending SLA Breach Notification.
b. Assign it to a Group.
c. Assign it to a Technician
Add SLA
For this admin guide, we will create a demonstration SLA.
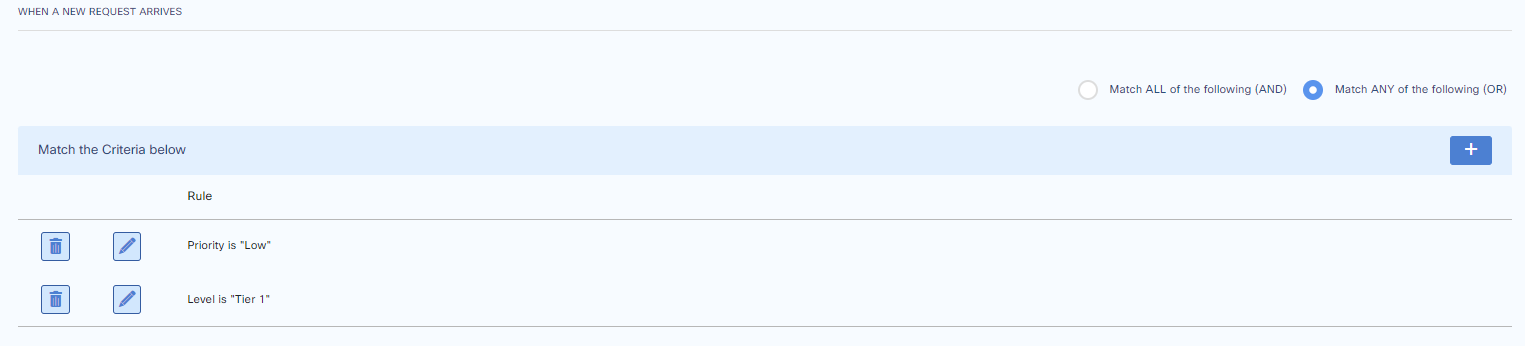
Condition: OR

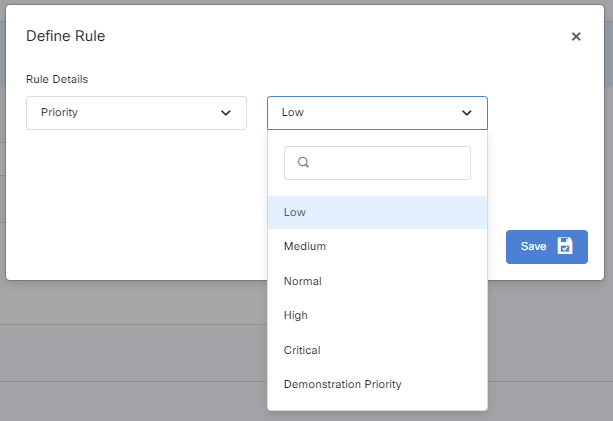
Low Priority
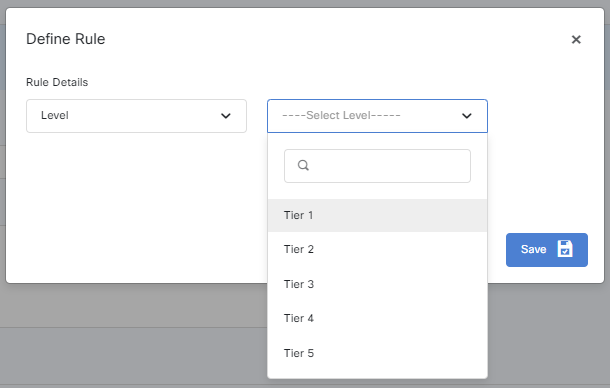
Tier is 1
Response Time = 3 Hours
Resolve Time = 8 Hours

1st Escalation
If response time is elapsed then escalate:
Notify to: Administrator
Escalate After: 15 minutes
Place in Group: Nil
Assign to Technician: Nil

If resolution time is elapsed then escalate:
Notify to: Administrator
Escalate After: 15 minutes
Place in Group: Nil
Assign to Technician: Nil

The SLA will be affected with Working Hours, Holidays and Weekends
taken into account

Furthermore from System Configuration our Workdays are:
TUE, THU, FRI, SAT, SUN
9 AM to 5 PM
To add an SLA go to:
Settings > General Settings > Service Level Agreement
On this list click on the New SLA button, then enter the name and description.
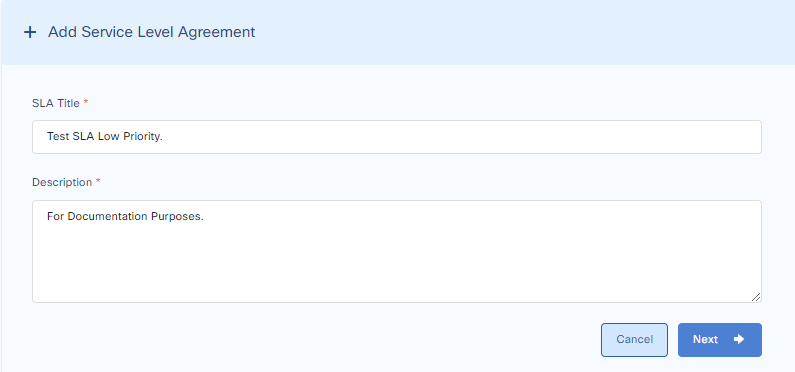
Apply Logic
Apply the logic (OR/AND) > Press the + button
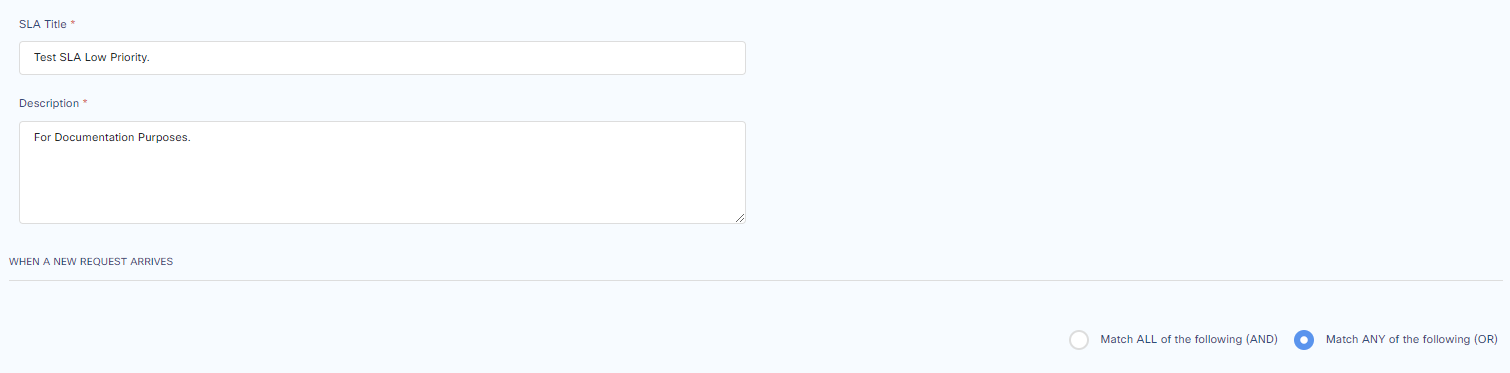
Define Rules
We will add a rule (Priority)
We will add another rule (Tier Level)
Conditions
The AND/OR condition is between Rules which are Level: Tier 1 and Priority: Low.
The AND rules describe that the SLA will only be applied if Priority of a Ticket is Low AND Level of a Ticket is Tier 1.
For example, a ticket with Tier 1 and medium Priority will not be applied the SLA because it does not match
both the criteria.
The OR rule describes a condition in which SLA will be applied if Priority of a Ticket is Low OR Level of a Ticket is Tier 1.
For example a Ticket with Tier 1 and Medium Priority with OR Rule will be applied this SLA because it meets
one of the two conditions.
System Defaults
SLAs are bound by working hours defined in System Settings
By default, the system comes with the following settings:
Weekdays: Mon, Tue, Wed, Thu, Fri
Working Hours: 9 AM to 5 PM
Weekend: Any day which is an OFF day (SAT, SUN)
To change these settings, go to:
Customize > System Configuration
Select appropriate settings.
Press save when finished.
Response Time
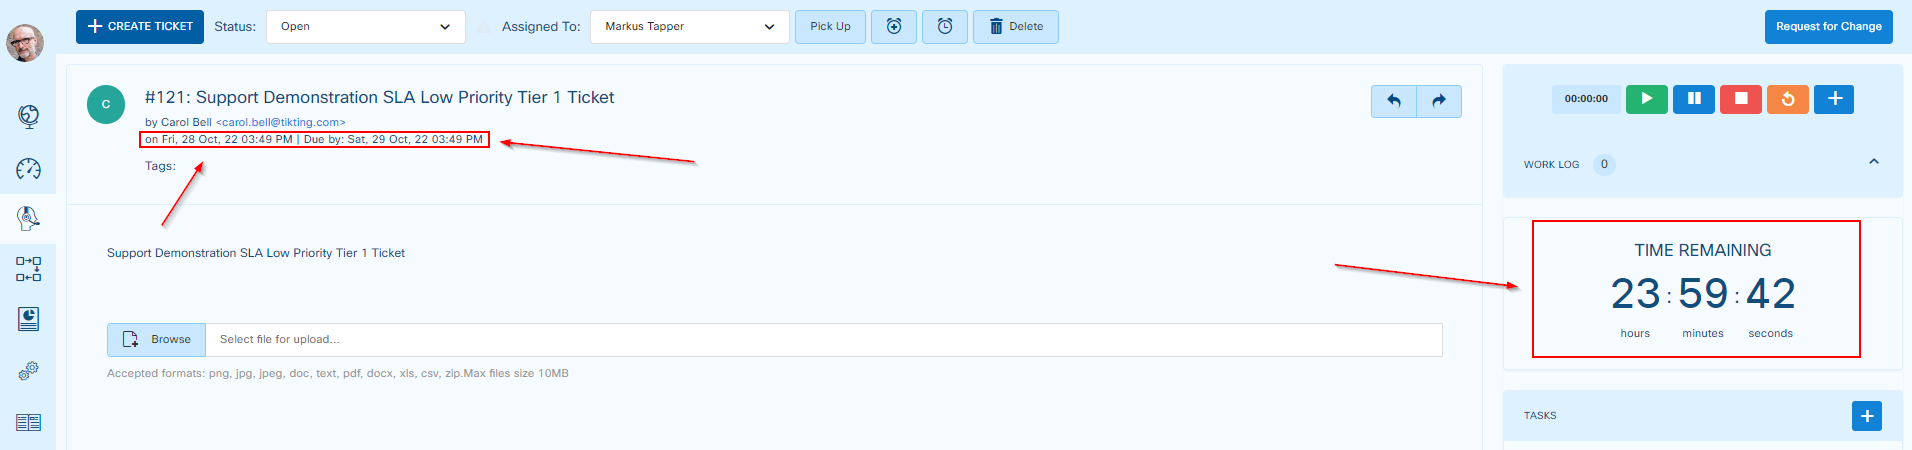
The Request Response Time is indicated when the ticket arrives: if no action is taken by the technician, the warning sign keeps blinking.

Below the ticket was created to be resolved within 8 working hours. The Operational Hours are 9 AM to 5 PM. The Ticket was created at 03:49 PM and the due date is calculated as 03:49 PM exactly 8 working hours later.
Resolution Time
The Request Resolution Time mandates a successful resolution or closure of the ticket.
SLA Violation Conditions
Actions taken between response and resolution time are only treated as Response actions. Resolution time is only affected by successful resolution or closure of the ticket.
Resolved / Responded irrespective of operational hours
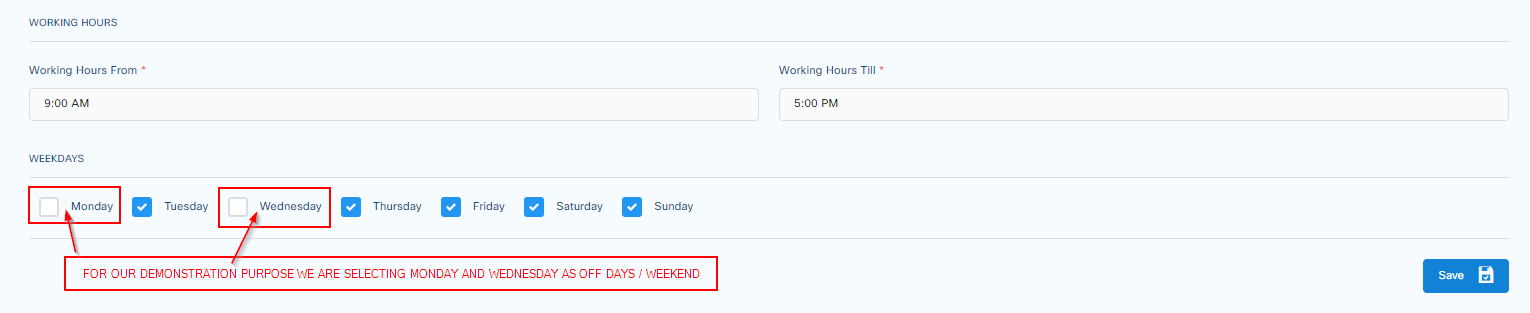
Below you can see that Mon and Wed are taken as OFF days. The irrespective weekend options will apply to Mondays and Wednesdays as well because the system will treat them as weekends for this particular SLA.
Resolved/Responded irrespective of operational hours indicates that this SLA will not be based on the default time (i.e. 9 AM to 5 PM) but on a 24-hour work clock.
Resolved/Responded irrespective of holidays refers to the holidays which are marked in the system calendar as holidays.
Resolved/Responded irrespective of weekend applies if your work shift mandates you to work on weekends (Saturday and Sunday).
Multiple Escalation Levels
Multiple escalation levels can similarly be set with their own defined criteria and actions.
Edit SLA
To edit an SLA go to:
Customize > General Settings > Service Level Agreement and SLA List Page will open. From there click the
edit / pencil button.
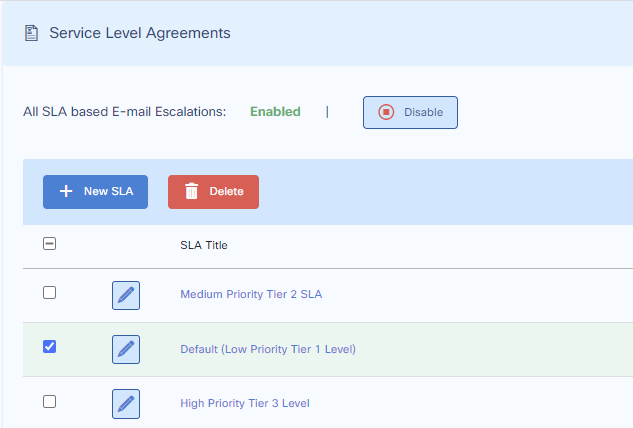
The settings page of that SLA will open from which you can change its settings.
New Tickets will automatically have the updated SLA settings applied.
Old Tickets will not have the new SLA applied. Their SLA Criteria (i.e. Priority, Level) will have to be changed manually.
Change SLA of a Ticket
SLAs applied can only be changed when the criteria rules (i.e. Tier Level, Priority) are changed from the ticket.
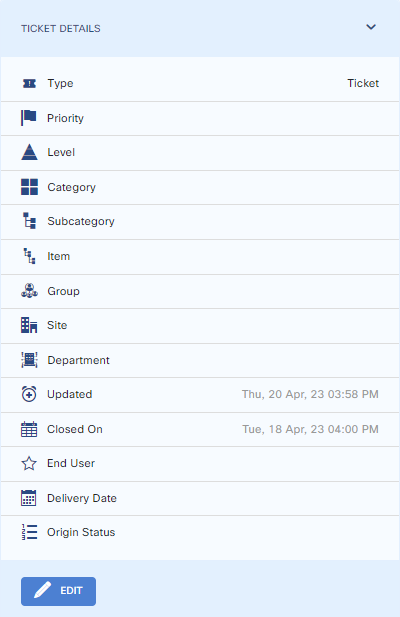
Step 1
Change the Priority to High and Tier to Level 3
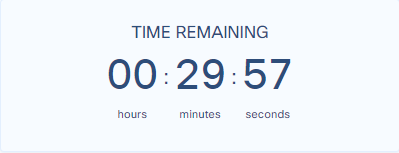
Step 2
Time Remaining is now set to configured Resolution time.
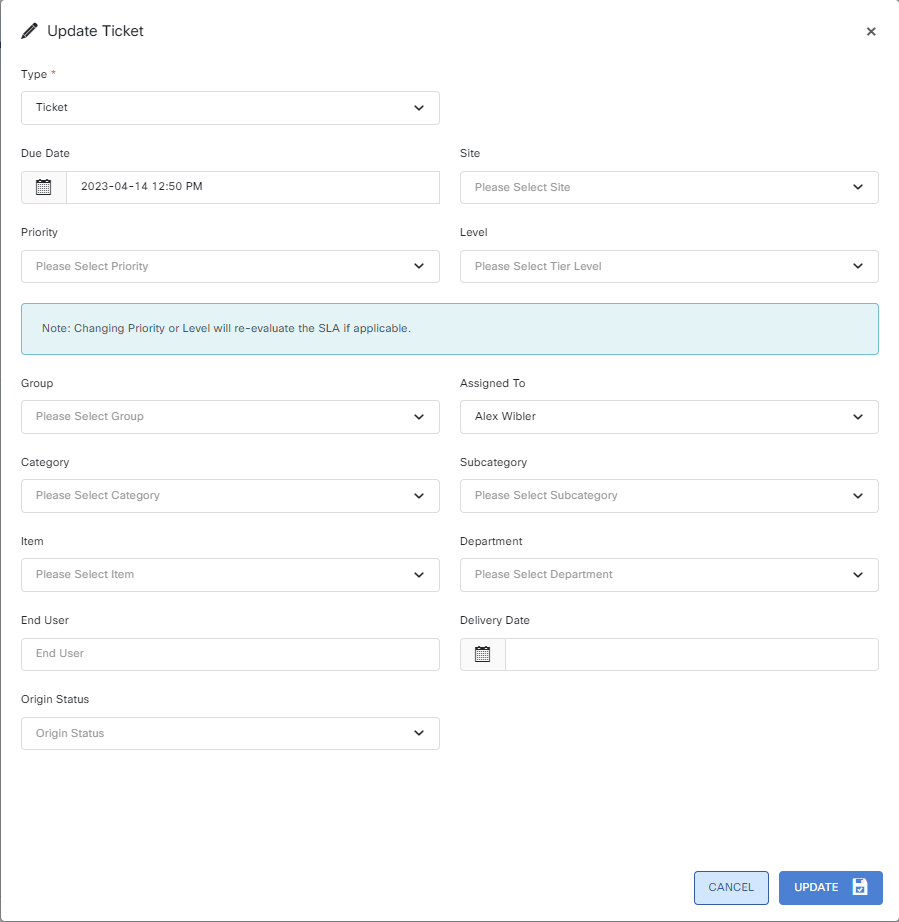
Step 3
Change the priority to Low and Tier to Level 1
Step 4
Time Remaining is now set to configured Resolution time.
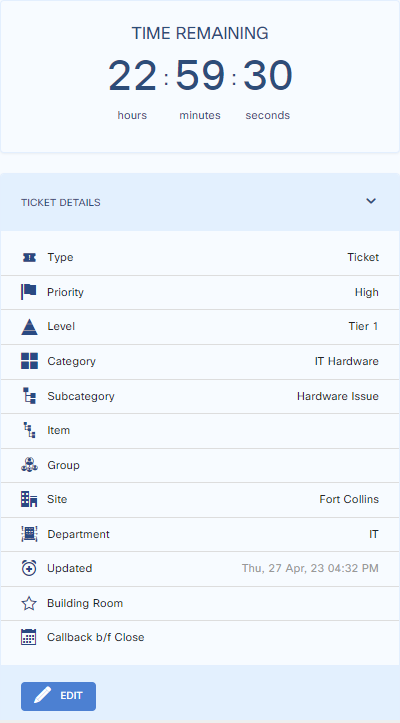
Note that if a ticket has been responded to, changing the SLA will not trigger the response escalation actions set in an SLA.
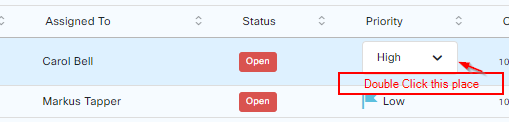
Change SLA of a ticket via inline editing on the main tickets page.
SLAs of a ticket can be changed. To do that, go to the ticket for which you want to change the priority or level > double click > a drop down menu appears from which the priority or level should be selected and then clicking outside of the row will save it quickly.
Delete SLA
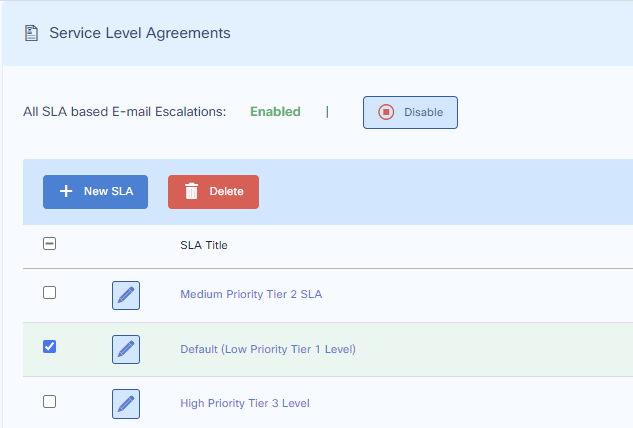
SLAs cannot be deleted if they are applied to any ticket in the system.
However, a new SLA which has not been applied to any tickets can be deleted. To do that, go to:
General Settings > Service Level Agreements > Select from list > Delete.
Best Practices and General Cautions
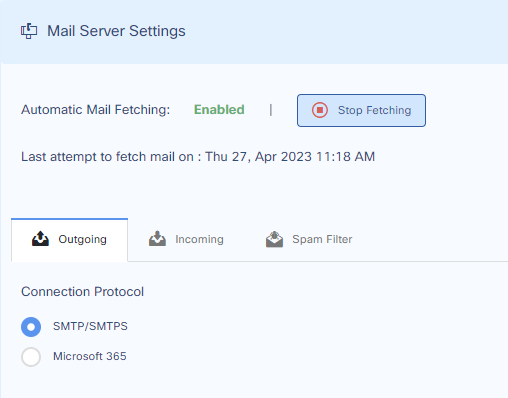
SLAs which are applied to any ticket cannot be deleted. It is therefore advised that such a task is run with the mail server turned off. To turn off the mail server please go to Customize > Mail Server Settings > Automatic Mail Fetching > Press Stop Fetching Button.
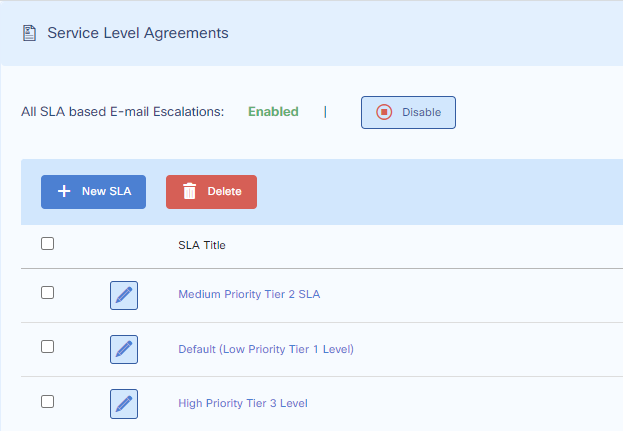
Sometimes administrators overlook enabling the SLA-based email Escalations options at the top of the SLA customize page. This will prevent the system from sending the SLA violation escalation reminders / alerts to the person for whom such escalations are configured.
Go to Customize > General Settings > Service Level Agreements > Then Press Enable / Disable Button.
Go over the System Settings before making SLAs to optionally set default priority or tier levels applied to incoming tickets.